

Admin Guide
ACP/Posting
Topic icons
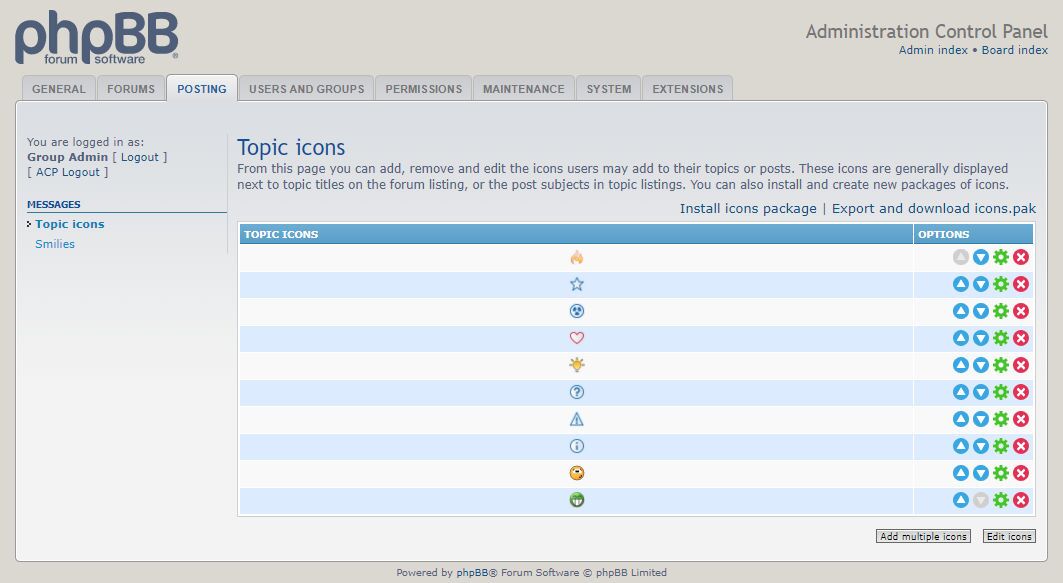
A useful feature is the ability to assign icons to topics. On this page, you can manage what topic icons are available for use on your board. You can add, edit, delete, or move topic icons. The TOPIC ICONS form displays the topic icons currently installed on your board. You can add topic icons manually, install a premade icons pack, export or download an icons pack file, or edit your currently installed topic icons.
Your first option to add topic icons to your board is to use a premade icons pack. Icon packs have the file extension pak. To install an icons pack, you must first download an icons pack. Upload the icon files themselves and the pack file into the /images/icons/ directory. Then, click INSTALL ICONS PAK. The INSTALL ICONS PAK form displays all of the options you have regarding topic icon installation. Select the icon pack you wish to add (you may only install one icon pack at a time). You then have the option of what to do with currently installed topic icons if the new icon pack has icons that may conflict with them. You can either keep the existing icon(s) (there may be duplicates), replace the matches (overwriting the icon(s) that already exist), or just delete all of the conflicting icons. Once you have selected the proper option, click INSTALL ICONS PAK.
To add topic icon(s) manually, you must first upload the icons into the icons directory of your site. Navigate to the Topic icons page. Click ADD MULTIPLE ICONS, which is located in the TOPIC ICONS form. If you correctly uploaded your new desired topic icon(s) into the proper /images/icons/ directory, you should see a row of settings for each new icon you uploaded. The following has a description on what each field is for. Once you are done with adding the topic icon(s), click, SUBMIT to submit your additions.
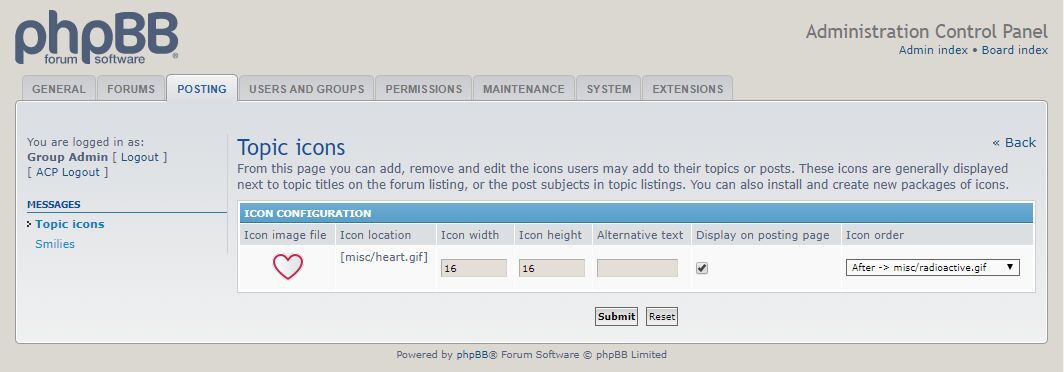
ICON IMAGE FILE: This column will display the actual icon itself.
ICON LOCATION: This column will display the path that the icon is located in, relative to the /images/icons/ directory.
ICON WIDTH: This is the width (in pixels) you want the icon to be stretched to.
ICON HEIGHT: This is the height (in pixels) you want the icon to be stretched to.
DISPLAY ON POSTING: If this checkbox is checked, the topic icon will actually be displayed on the posting screen.
ICON ORDER: You can also set what order that the topic icon will be displayed. You can either set the topic icon to be the first, or after any other topic icon currently installed.
ADD: If you are satisfied with the settings for adding your new topic icon, check this box.
You may also edit your currently installed topic icons' settings. To do so, click EDIT ICONS. You will see the ICON CONFIGURATION form. For more information regarding each field, see the above paragraph regarding adding topic icons.
Lastly, you may also reorder the topic icons, edit a topic icon's settings, or remove a topic icon. To reorder a topic icon, click the appropriate "move up" or "move down" icon. To edit a topic icon's current settings, click the "settings" button. To delete a topic icon, click the red "delete" button.
Smiles
Smilies or emoticons are typically small, sometimes animated images used to convey an emotion or feeling. You can manage the smilies on your board via this page. To add smilies, you have the option to either install a premade smilies pack, or add smilies manually. Locate the SMILIES form, which lists the smilies currently installed on your board, on the page.
Your first option to add smilies to your board is to use a premade smilies pack. Smilies packs have the file extension pak. To install a smilies pack, you must first download a smilies pack. Upload the smilies files themselves and the pack file into the /images/smilies/ directory. Then, click INSTALL SMILIES PAK. The INSTALL SMILIES PAK form displays all of the options you have regarding smilies installation. Select the smilies pack you wish to add (you may only install one smilies pack at a time). You then have the option of what to do with currently installed smilies if the new smilies pack has icons that may conflict with them. You can either keep the existing smilies (there may be duplicates), replace the matches (overwriting the smilies that already exist), or just delete all of the conflicting smilies. Once you have selected the proper option, click INSTALL SMILIES PAK.
To add a smiley to your board manually, you must first upload the smilies into the /images/smilies/ directory. Then, click on ADD MULTIPLE SMILIES. From here, you can add a smilie and configure it. The following are the settings you can set for the new smilies. Once you are done adding a smiley, click SUBMIT.
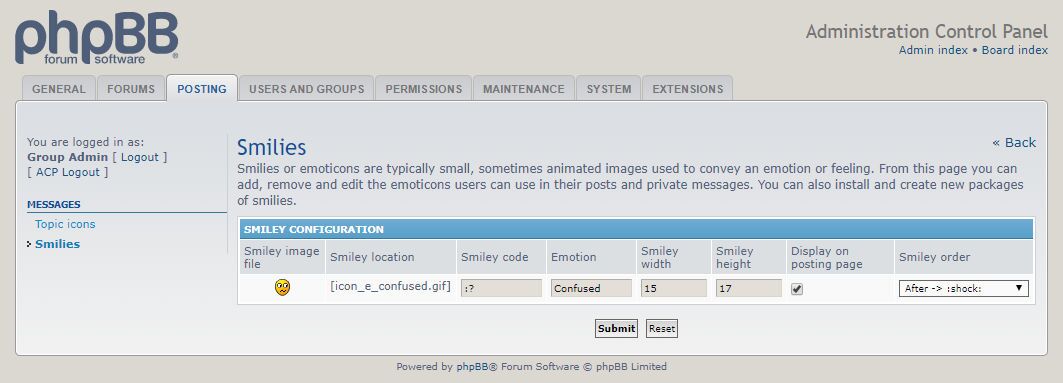
SMILEY IMAGE FILE: This is what the smiley actually looks like.
SMILEY LOCATION: This is where the smiley is located, relative to the /images/smilies/ directory.
SMILEY CODE: This is the text that will be replaced with the smiley.
EMOTION: This is the smiley's title.
SMILEY WIDTH: This is the width in pixels that the smiley will be stretched to.
SMILEY HEIGHT: This is the height in pixels that the smiley will be stretched to.
DISPLAY ON POSTING: If this checkbox is checked, this smiley will actually be displayed on the posting screen.
SMILEY ORDER: You can also set what order that the smiley will be displayed. You can either set the smiley to be the first, or after any other smiley currently installed.
ADD: If you are satisfied with the settings for adding your new smiley, check this box.
You may also edit your currently installed smilies' settings. To do so, click EDIT SMILIES. You will see the SMILEY CONFIGURATION form. For more information regarding each field, see the above paragraph regarding adding smilies.
Lastly, you may also reorder the smilies, edit a smiley's settings, or remove a smiley. To reorder a smiley, click the appropriate "move up" or "move down" icon. To edit a smiley's current settings, click the "settings" button. To delete a smiley, click the red "delete" button.
